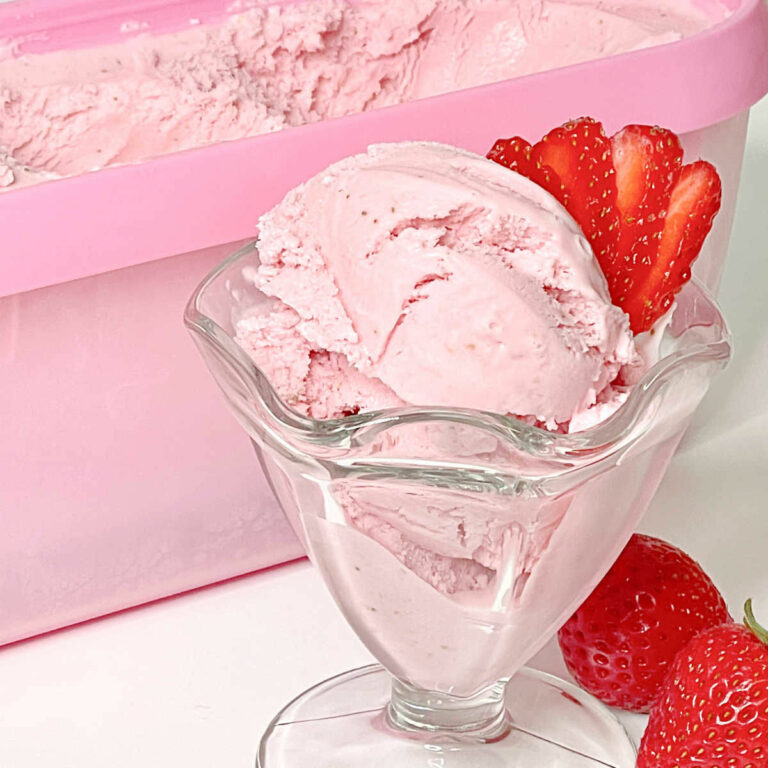
A delicious, homemade, dairy-free, keto-friendly, custard-based Keto Pumpkin Pie Ice Cream that blends real pumpkin puree with pumpkin pie spice and Swerve brown sugar. The rich flavor will have you begging for more.
This ice cream taste just like a slice of pumpkin pie!
This recipe has been updated to change out Powdered Swerve for Allulose which does a much better job at keeping the ice cream from getting too hard in the freezer.
This post may contain affiliate links, which helps keep this content free. Please read our disclosure for more info.
How to Make Keto Pumpkin Pie Ice Cream
To make this keto pumpkin pie ice cream recipe, you will need an ice cream maker and I personally recommend the Cuisinart 1.5 Quart Ice Cream Maker. The double-insulated freeze bowl eliminates the need for rock salt. No mess and super easy clean-up!
The instructions recommend keeping the freeze bowl in the freezer for 24 hours prior to making the ice cream, but I keep it in my freezer full time so it’s always ready to go!

Related: If you love Tiramisu, you have to try my Keto Tiramisu Ice Cream!
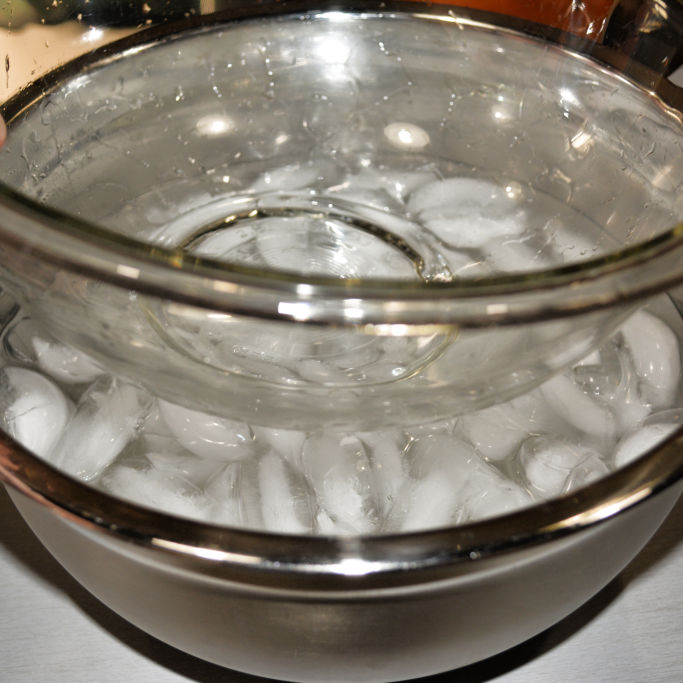
Before you begin, prepare an ice bowl so you can quickly chill the custard mixer.
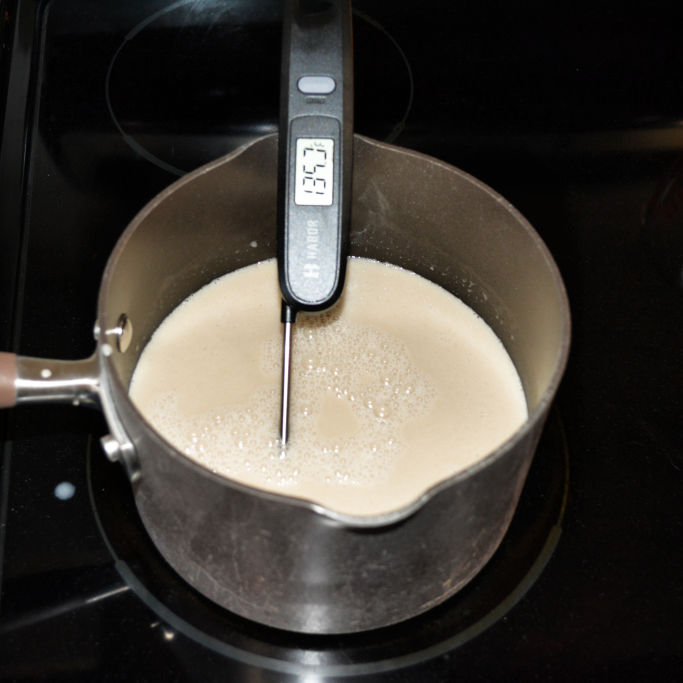
Combine the coconut cream, almond milk, brown swerve, Allulose and in a medium saucepan and bring the mixture to 175 degrees F over medium heat, stirring occasionally.
While the ice cream liquid base is heating up, divide the eggs. Whisk together the egg yolks with Yacon syrup and pumpkin pie spice in a medium-sized bowl.
Once the sweetened milk has reached 175 degrees, remove it from the heat, and pour 1 cup into a measuring cup.
SLOWLY pour 1 cup of the hot sweetened milk mixture over the egg yolk mixture while whisking vigorously. This will temper the eggs, slowly cooking them, without scrambling them.
Now reverse that process and pour the egg/milk mixture back into the saucepan, while whisking the liquid in the pan.
Return the saucepan to the burner, and continue heating over medium heat until the temperature reaches 180 degrees F.
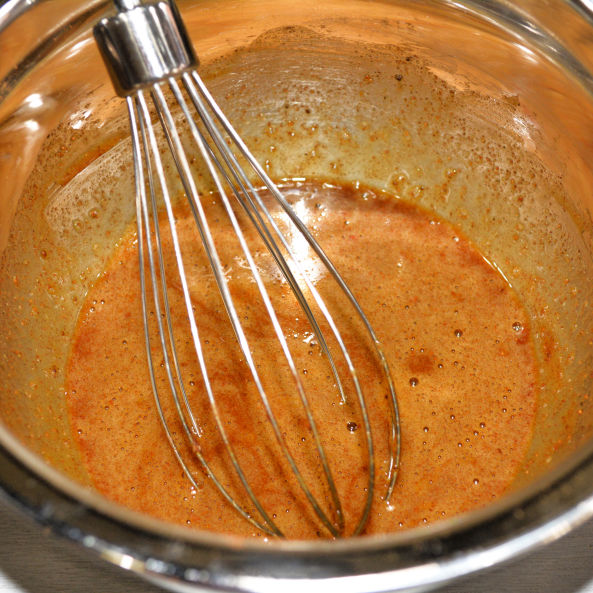
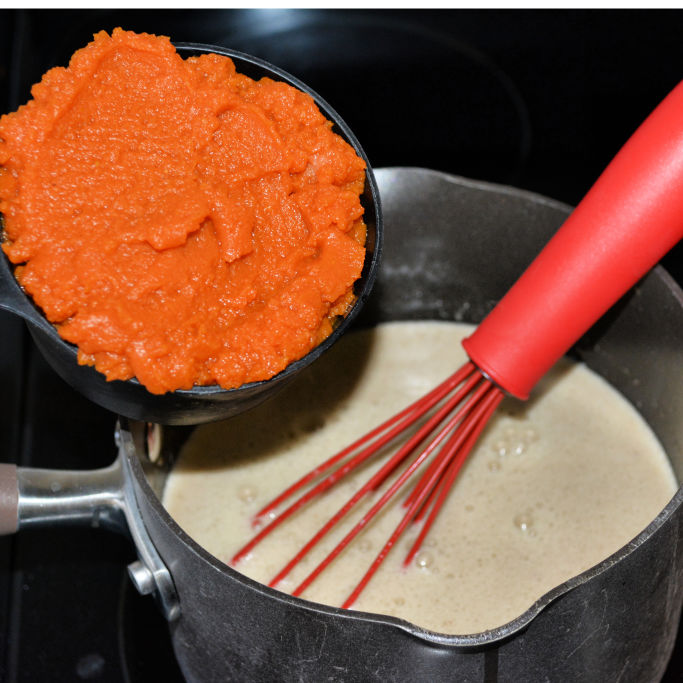
Remove from heat and whisk in pumpkin puree until fully incorporated.
Pour the hot ice cream mixture into the ice bath bowl. Let the ice cream cool for 10 minutes in the ice bath, then remove the top bowl, cover with plastic wrap, and put into the refrigerator for 3+ hours. I don’t recommend letting it sit in the refrigerator for more than 24 hours.
Once the ice-cream mixture is cooled, remove it from the refrigerator and whisk in the vanilla extract. Then churn following your ice-cream maker’s instructions.
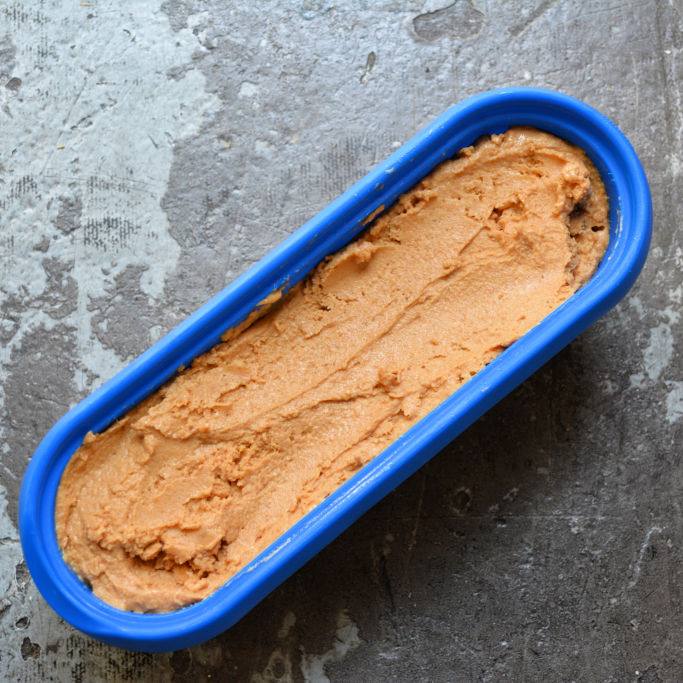
You can enjoy it straight from the ice-cream maker as a soft-serve ice-cream or put it in an ice-cream container and freeze until hard. This ice cream recipe did take longer to harden with the pumpkin puree in it. Instead of the normal 3 hours, it needed closer to 6 hours to harden.
Don’t forget the whipped cream! I’ve created a delicious keto whipped cream that is perfect on top of a couple of scoops of this pumpkin pie ice cream recipe. Check that out here.
Now I have a favor to ask! If you enjoy this keto pumpkin pie ice cream recipe, please give me a star rating in the recipe card below and share this post on your favorite social media platform?
Make sure to check out these other amazing pumpkin recipes!
Keto Pumpkin Cheesecake Thumbprint Cookies
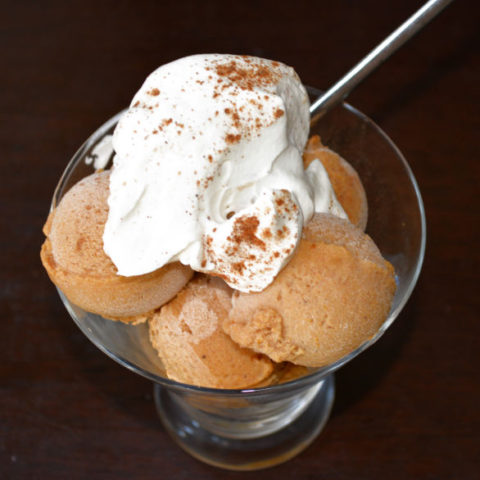
Pumpkin Pie Ice Cream Recipe – Dairy Free and Keto Approved!
A delicious, homemade, dairy-free, keto-friendly, custard-based Keto Pumpkin Pie Ice Cream that blends real pumpkin puree with pumpkin pie spice and Swerve brown sugar.
Ingredients
- 2 cups coconut cream
- 1 cup almond milk
- 1/3 cup Brown Swerve
- 1/3 cup Alluse
- 4 large egg yolks
- 1 tsp Yacon syrup (optional, it's a molasses substitute)
- 2 tsp Pumpkin Pie Spice
- 1 cup pumpkin puree
- 1 tsp vanilla extract
Instructions
- Create an ice bath with two bowls. Ice water in the bottom bowl with the second bowl sitting on top. Set aside for later.
- In a saucepan, over medium heat, bring the heavy cream, brown swerve, and powdered swerve to 175 degrees F, whisking as needed.
- While the ice cream liquid base is heating up, divide the eggs and put your yolks into a medium-sized bowl along with the Yacon syrup and Pumpkin Pie Spice.
- Once the sweetened milk has reached 175 degrees, remove it from the heat, and pour 1 cup into a measuring cup.
- SLOWLY pour 1 cup of the hot sweetened milk mixture over the egg yolks while whisking the egg yolks vigorously. This will temper the eggs, slowly cooking them, without scrambling them. Once done, you should have a liquid mixture of egg yolks and sweetened milk.
- Now reverse that process and pour the egg/milk mixture back into the saucepan, while whisking the liquid in the pan.
- Return the saucepan to the burner, and continue heating over medium heat until the temperature reaches 180 degrees F.
- Remove from heat and whisk in pumpkin puree until fully incorporated.
- Pour the hot ice cream mixture into the ice bath bowl. Let the ice cream cool for 10 minutes in the ice bath, then remove the top bowl, cover with plastic wrap, and put into the refrigerator for 3+ hours. I don’t recommend letting it sit in the refrigerator for more than 24 hours.
- Once the ice-cream mixture is cooled, remove it from the refrigerator and whisk in the vanilla extract. Then churn following your ice-cream maker’s instructions.
- You can enjoy it straight from the ice-cream maker as a soft-serve ice-cream or put it in an ice-cream container and freeze for at least 3-6 hours to harden it.
Notes
This recipe has been updated to change out Powdered Swerve for Allulose which does a much better job at keeping the ice cream from getting too hard in the freezer.
Nutrition Information:
Serving Size: 1/2 cupAmount Per Serving: Calories: 148Total Fat: 13gCarbohydrates: 5gFiber: 1gProtein: 3g