Finding healthy snacks dairy free options that actually satisfy that crunchy, salty craving can feel impossible, especially when you’re keeping carbs in check. I’ve been there, standing in front of the pantry at 3 p.m., wanting something crispy and savory without reaching for cheese or crackers. That’s when I started playing around with roasted chickpeas, and honestly, they’ve become my go-to afternoon rescue.
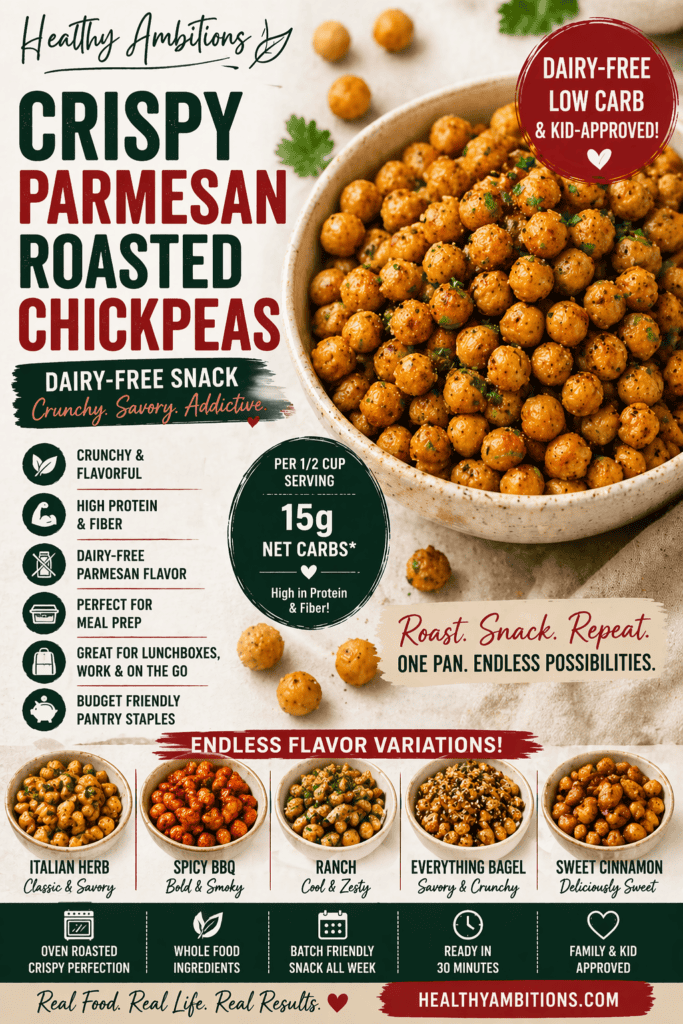
These crispy parmesan roasted chickpeas hit all the right notes. They’re crunchy, flavorful, and surprisingly filling thanks to the protein and fiber. The “parmesan” comes from nutritional yeast, which gives you that cheesy, umami flavor without any dairy. They’re simple enough to make on a weeknight, and they store beautifully, so you can batch them for the week ahead.
Whether you’re packing school lunches, meal prepping snacks for work, or just need something to munch on during movie night, these chickpeas deliver. They’re also kid-friendly, which means you’re not making separate snacks for everyone. Just one simple recipe that works for the whole household.
This post may contain affiliate links, which helps keep this content free. Please read our disclosure for more info.
Why You’ll Love This Recipe
- Truly dairy-free without sacrificing that cheesy, savory flavor you’re craving
- Low-carb friendly compared to traditional chickpea servings when portioned mindfully
- Incredibly versatile with endless flavor variations to keep things interesting
- Budget-friendly using pantry staples you probably already have
- Batch-friendly so you can make a big batch and snack all week
- No special equipment needed, just a baking sheet and your oven
- Kid-approved which means less negotiating and more eating
- Portable for lunchboxes, car snacks, or desk drawer emergencies
Ingredients
For the chickpeas:
- 2 cans (15 oz each) chickpeas, drained and rinsed
- 2 tablespoons avocado oil (or olive oil)
- 3 tablespoons nutritional yeast
- 1 teaspoon garlic powder
- 1 teaspoon onion powder
- ½ teaspoon sea salt
- ¼ teaspoon black pepper
- ¼ teaspoon smoked paprika (optional, for depth)
Optional add-ins:
- ½ teaspoon dried Italian herbs
- Pinch of cayenne for heat
- 1 teaspoon lemon zest for brightness
Instructions
Step 1: Prep Your Chickpeas
Drain and rinse your chickpeas thoroughly. This is where most people rush, but take an extra minute here. Pat them completely dry with a clean kitchen towel or paper towels. The drier they are, the crispier they’ll get. I usually let them air dry for 10-15 minutes while the oven preheats.
Remove any loose skins that come off during drying. You don’t need to peel every single chickpea (that would take forever), but the skins that naturally fall away will just burn in the oven anyway.
Step 2: Preheat and Prepare
Preheat your oven to 400°F. Line a large baking sheet with parchment paper. This prevents sticking and makes cleanup so much easier, especially when you’re tired at the end of the day.
Spread the dried chickpeas in a single layer on the prepared baking sheet. Don’t overcrowd them. If they’re touching too much, they’ll steam instead of crisp. Use two baking sheets if needed.
Step 3: Season Generously
Drizzle the chickpeas with avocado oil and toss to coat evenly. You can do this right on the baking sheet or in a bowl if that’s easier for you.
In a small bowl, combine the nutritional yeast, garlic powder, onion powder, salt, pepper, and smoked paprika. Sprinkle this mixture over the oiled chickpeas and toss again until every chickpea is coated. Don’t be shy with the seasoning. You want flavor in every bite.
Step 4: Roast to Perfection
Roast for 25-30 minutes, shaking the pan every 10 minutes. This ensures even browning and prevents burning on one side. They’re done when they’re golden brown and crispy on the outside. You’ll hear them rattling around when you shake the pan, that’s a good sign.
Let them cool completely on the baking sheet. This is important. They’ll continue to crisp up as they cool, and eating them hot can be deceiving. They might seem soft but will firm up beautifully.
Step 5: Store or Serve
Once cooled, transfer to an airtight container. They’ll stay crispy for 3-5 days at room temperature. If they lose their crunch, just pop them back in a 350°F oven for 5-7 minutes to refresh them.
Substitutions & Allergy-Friendly Options
Oil-free option: You can skip the oil entirely and use aquafaba (the liquid from the can) to help the seasonings stick. The texture will be slightly different but still good.
Nut-free: This recipe is naturally nut-free, making it perfect for school lunches and allergy-friendly households.
Soy-free: Nutritional yeast is naturally soy-free, so you’re covered here. Just double-check your brand if you have severe allergies.
For those avoiding legumes: You can use the same method with shelled edamame or even cubed firm tofu for a different texture. The seasonings work beautifully on both.
Flavor alternatives: If you don’t have nutritional yeast, you can use a dairy-free parmesan alternative or simply increase the garlic and onion powder with a tablespoon of hemp hearts for nuttiness.
Looking for more dairy-free options? These healthy dairy-free snacks from BBC Good Food offer additional inspiration for your snack rotation.
Macros / Carb Awareness
| Nutrient | Per ½ Cup Serving |
|---|---|
| Calories | 140 |
| Net Carbs | 15g |
| Protein | 7g |
| Fat | 5g |
| Fiber | 5g |
Carb note: Chickpeas are higher in carbs than many low-carb snacks, so portion control matters here. A half-cup serving keeps you in a moderate range and provides substantial protein and fiber, which helps with satiety and blood sugar stability.
For stricter low-carb or keto eating, enjoy these as an occasional treat rather than a daily staple. They work beautifully when you need something crunchy and portable that won’t completely derail your goals.
The protein and fiber content makes these more blood-sugar-friendly than chips or crackers. You’re getting real nutrition, not just empty carbs. If you’re tracking macros closely, weigh your portions and adjust based on your daily targets.
Meal Prep, Storage & Freezer Tips
Make-ahead strategy: Double or triple this recipe on Sunday and portion into individual containers for the week. I use small mason jars or reusable snack bags. They’re perfect for grabbing on your way out the door.
Storage guidelines: Keep chickpeas in an airtight container at room temperature for best texture. Refrigeration can make them softer, though you can refresh them in the oven.
Freezing: Honestly, I don’t recommend freezing these. They lose their crunch and become mealy when thawed. Stick to making fresh batches weekly instead.
Reheating: If they’ve gone soft, spread on a baking sheet and reheat at 350°F for 5-7 minutes. Let them cool again before eating. This trick has saved many batches in my house.
Portion prep: Measure out ½-cup portions into small containers or bags right after they cool. This prevents mindless eating and helps you stick to your goals without feeling deprived.
For more batch-friendly low-carb ideas, check out these easy keto comfort food swaps that work well for meal prep.
Variations
Air Fryer Method
Preheat your air fryer to 380°F. Prepare chickpeas the same way, making sure they’re completely dry. Cook for 12-15 minutes, shaking the basket every 5 minutes. They cook faster in the air fryer and get incredibly crispy. Watch them closely after 10 minutes to prevent burning.
Slow Cooker (Not Recommended)
I’ve tried making these in the slow cooker, and honestly, they just don’t crisp up properly. The moisture has nowhere to escape. Stick with the oven or air fryer for best results.
Sweet Version
For a dessert-style healthy snacks dairy free option, toss dried chickpeas with coconut oil, cinnamon, and a sugar-free sweetener like monk fruit or erythritol. Roast the same way. They’re like cinnamon sugar bites without the guilt.
Ranch Seasoning
Replace the parmesan seasonings with 2 tablespoons of dairy-free ranch seasoning mix. You can make your own with dried dill, parsley, garlic powder, onion powder, and a pinch of cayenne.
Taco-Spiced
Use chili powder, cumin, paprika, and a touch of lime zest. These are amazing on salads or as a crunchy topping for low-carb chicken carbonara.
Everything Bagel
Toss with everything bagel seasoning instead of the parmesan blend. Simple, flavorful, and seriously addictive.
For more creative flavor ideas, this collection from Olive Magazine includes unique dairy-free options worth exploring.
FAQ
Can I use dried chickpeas instead of canned?
Absolutely! Cook dried chickpeas until tender, then drain and dry them thoroughly. The texture will be slightly different but still delicious. Canned are just more convenient for weeknight cooking.
Why aren’t my chickpeas getting crispy?
The most common culprit is moisture. Make sure they’re completely dry before roasting, don’t overcrowd the pan, and give them enough time in the oven. Also, let them cool completely. They crisp up as they cool down.
Are these actually low-carb?
They’re lower-carb than traditional snacks like pretzels or chips, but they’re not zero-carb. For strict keto, portion carefully. For general low-carb eating, they’re a nutritious choice that provides protein and fiber alongside those carbs.
Will kids eat these?
Most kids love the crunchy texture. Start with mild seasonings like simple salt and garlic powder, then gradually introduce more adventurous flavors. Let them help make them, it increases buy-in significantly.
How do these compare to store-bought roasted chickpeas?
Homemade are fresher, cheaper, and you control exactly what goes into them. No weird preservatives or excess sodium. Plus, you can customize flavors to your family’s preferences. Store-bought work in a pinch, but homemade wins every time.
Can I make these without nutritional yeast?
Yes! You can use a store-bought dairy-free parmesan, increase the other seasonings, or try more dairy-free snack ideas for alternative flavor profiles.
Final Tips + Gentle Encouragement
Remember, these healthy snacks dairy free don’t have to be perfect to be good. If your first batch isn’t as crispy as you’d like, adjust the drying time or oven temperature next time. Cooking is all about learning what works in your kitchen with your equipment.
Quick wins for success:
- Always dry chickpeas thoroughly
- Don’t skip the parchment paper
- Shake the pan regularly while roasting
- Let them cool completely before storing
- Season generously for maximum flavor
The beauty of this recipe is its flexibility. You’re not locked into one flavor profile or one cooking method. Experiment with what you have on hand and what your family enjoys.
If snacking is where you struggle most with dairy-free eating, start here. Master this one recipe, then branch out. Progress over perfection, always. You’re building sustainable habits, not chasing perfect execution.
These chickpeas work beautifully alongside other simple recipes like keto chicken nuggets in the air fryer for a complete snack plate the whole family will enjoy.
For even more healthy snacks dairy free inspiration, explore this comprehensive list from Healthline featuring creative options for both adults and children.
Finding healthy snacks dairy free that fit into busy family life doesn’t have to be complicated or restrictive. These crispy parmesan chickpeas prove that simple ingredients and straightforward methods can create something truly satisfying. If you’re looking for more practical, doable recipes that work for real life, Healthy Ambitions offers simple low-carb and sugar-free recipes with dairy-free swaps, batch-friendly tips, and the encouragement you need to build habits that actually stick.